A few days ago (When I say "a few days ago" I try to say a lot of time ago, a lot) I read an article about reasons can cause an outbreak of acne or some infection in the face and one of them was, dirty brushes. So you may guess how was my reaction after I read that article. I started to searching my brushes to apply the cleaning method, but the problem was that I didnt know how to wash them, so I had to do a several research in magazines and my last option was the Internet.
********
Hace unos días (Cuando digo hace unos días intento decir hace mucho tiempo, muucho tiempo) leí un artículo sobre cómo las brochas sucias pueden ocasionar brote de acné o alguna infección en el rostro, así que podrán imaginar mi reacción tan sorpresiva al leer este artículo. Al momento de terminar de leerlo busque mis brochas e inicie el proceso de limpieza. El problema era que no sabía cómo lavarlas, así que tuve que realizar varias búsquedas en revistas y mi última opción fue internet.
Leer en Español Read in English
Sin más rodeos y para no dejarte con las dudas de higiene con las brochas de maquillaje, aquí vamos.
- Es importante tener una rutina de limpieza de las brochas, Mínimo: una semana - Máximo: 1 mes, para evitar bacterias y la pigmentación de la piel.
- Después de lavadas, tenga en cuenta que las brochas necesitaran de un tiempo para secarse luego de una limpieza profunda, así que es recomendable lavarlos después de aplicar el maquillaje o en la tarde para tenerlo listo al otro día.
Esta es la forma de lavarlos, necesita:
- Champú, este debe ser un champú suave, recomendable champú para bebés. Yo utilizo Johnsons Baby.
- Su fregadero
- Toalla de algodón
- Recipiente de poca profundidad.
Instrucciones:
1. Inicie situando sus brochas en el recipiente de poca profundidad con agua tibia, intente ubicarlo solo en la base de las puntas. Con el tiempo este proceso podría dañar la manga y podría desprenderse y/o evitar daños si este mango es de madera.
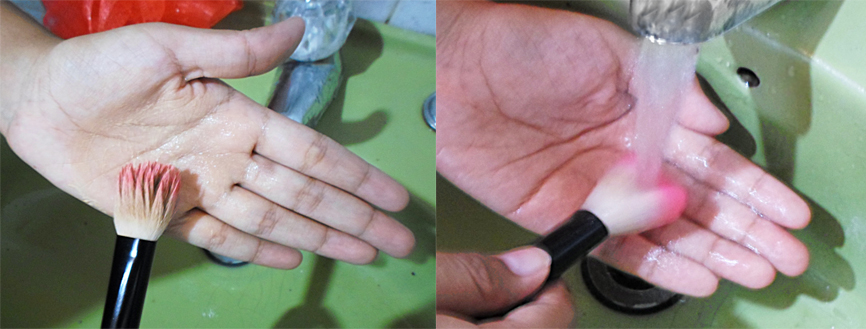
2. Aplique una gota de champú en su mano (dependiendo del volumen del pelo de la brocha) e inicia frotando la brocha en tu mano de forma circular. Frótalo hasta que veas que la espuma cambie de color en tu mano.
3. Repite el proceso. Cuando ya obtengas la espuma de otro color, lava tu mano y vuelve a seguir con el segundo paso hasta el momento en que la espuma salga 100% limpia.
4. Enjuaga. Coloca el pincel boca abajo en el grifo mientras pasa el agua intenta seguir frotando en círculo – por si las dudas – y detente cuando ya no veas espuma.
Proceso de Secado:
- Ni por el ángel intentes secar las brochas boca arriba/De pie, automáticamente despídete de la brocha si llegase el caso. Cuando se secan de esta manera el agua va hacia la dirección del mango y esto deforma los pinceles, además afloja el adhesivo del mango y esta se podría desprender.
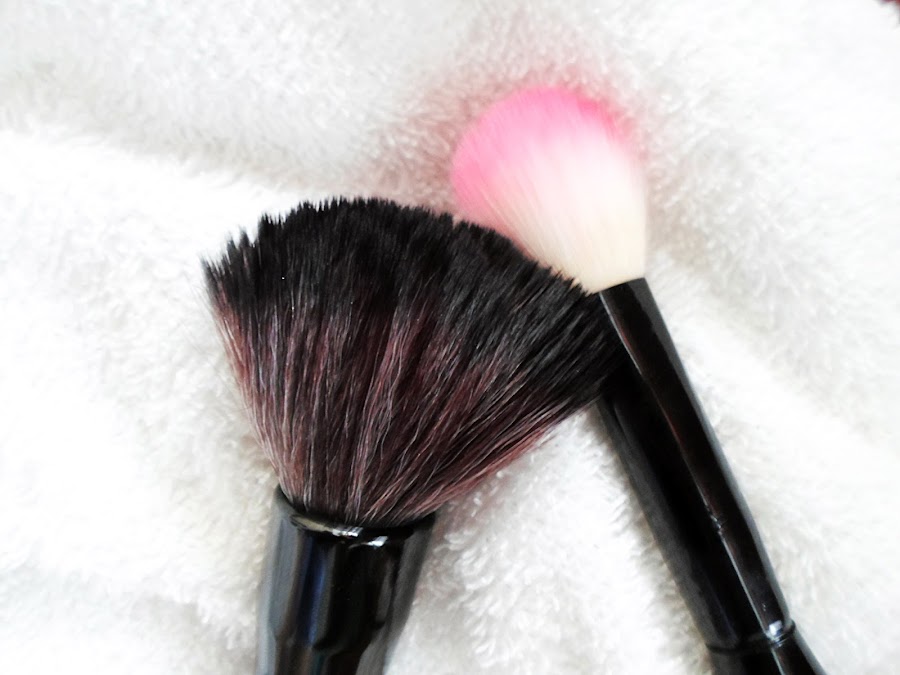
- Es entonces que es cuando utilizas la toalla de algodón (esta es la manera en que yo seco mis brochas). Las froto un poco en la toalla para retirar lo que queda de suciedad y al final los dejo en posición horizontal poniendo la otra parte de la toalla encima dejándolos secar en temperatura ambiente.
Y ese es el proceso de limpieza para tus brochas, y créeme que si no las has lavado en un largo tiempo y sigues las instrucciones notaras un gran y excelente cambio en los pinceles, el maquillaje se verá mejor y se adaptará mejor a la piel. Y además te sentirás más limpia al aplicarlo.
Without any further ado, and not to leave you with any doubts of the cleaning process for you makeup brushes, here are the instructions.
- It is very important to clean your brushes regularly to avoid any bacteria, Minimum: one week - Maximum: 1 month.
- After washed, bear in mind that the brushes needed a time to dry after a deep cleaning, so I recommend washing them after you have applied the makeup or in the evening to have it full dry the next day.
This is my way to clean the brushes. You will need:
- Shampoo, this one must be a soft shampoo, recommendable baby shampoo. I use Johnsons Baby.
- Your Sink.
- A towel.
- A shallow bowl
INSTRUCTIONS:
1. Start by placing your brushes in the shallow bowl with lukewarm water, try to locate on the actual bristles while avoiding the part of the brush where handle meets the head. With time this process might damage the sleeve and might become detached and / or avoid hurts(damages) if this handle is of wood.
2. Apply a drop of shampoo in your hand (depending on the volume of the hair of the brush) and start to rubbing the brush in your hand in circular form. Rub it until you see that the foam changes color in your hand.
3. Repeat the process. When you already obtained the foam in another color, wash your hand and continue the second step until the foam goes out 100% clean.
4. Rinsed. Repeat steps two and three until the water runs clear from the brush.
Drying process:
- Do not dry brushes standing upright or water may run down and loosen the adhesive that holds the brush and bye bye.
- Here is when you use the towel, rub it a bit to wipe your brush clean and lay your brushes flat to dry.
And there you have it, hope it really helps you.
Bloglovin | Pinterest | Facebook | Twitter | Instagram |
Youtube


